Infills – additional small cabinets that are fitted between main gaming machines in order to create constant line of cabinets without gaps between them (most commonly seen in a big leisure centers and casinos). They also allow each player to have a comfortable amount of space and provide some space for the service maintenance.
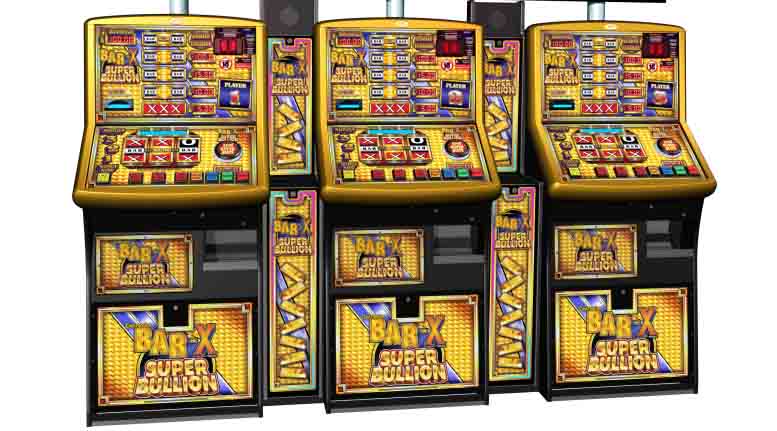
Picture.1 – Cabinet infills (as seen between 3 cabinets)
Depending from gaming environment and cabinets position, infills can be made in different shapes and sizes (linear, corner, round, angled, etc..) Apart from separating cabinets they can also provide extra functionality and improve overall gaming experience.
Soon after accomplishing the new GamePro cabinet for Reflex Gaming I was asked to develop a linear version of the infill. The new infill was designed with 2 illuminated front acrylic panels and a horizontal shelf between them. The shelf was designed to allow players to keep their drinks and provided usb option to charge their gadgets. To make the product attractive I develop infill with slightly curved front shape which was following the main profile cabinet.
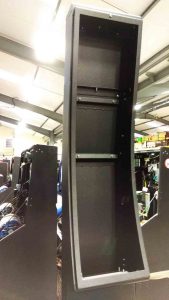
Picture.2 – Infill – Top curved shape
The front part of the shelf was designed with illuminated acrylic edge to improve visual appearance of the product in dark environment.
After building and testing 4 prototypes, I made a number of updates to bring the concept to the final production stage. The infill was a great addition to cabinets and improved appearance of the overall gaming environment.
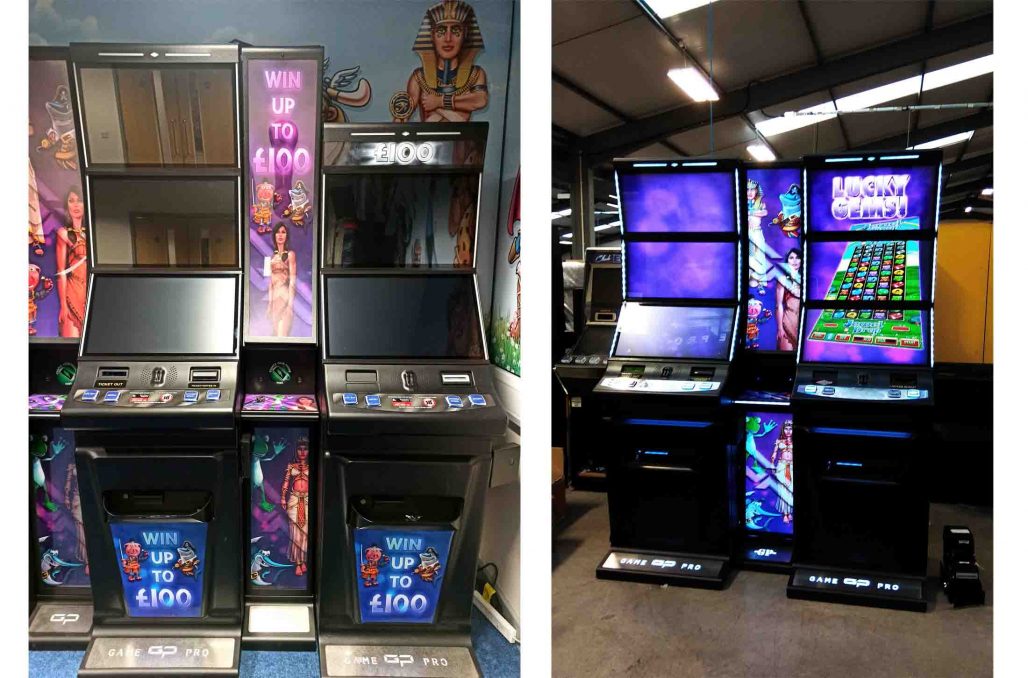
Picture.3 – GamePro Infill
I enjoyed developing this product and was happy to see the final result of my work.
As I joined Reflex Gaming in 2016, I was given a task to develop / design a new cabinet for the digital market. Most of the company products were on a market for more than a decade and lost significant interest during that time. The company required this new cabinet to keep with demand of the digital gaming industry.
The initial concept of the new cabinet was based on a wooden chassis with metal covers attached on each side. This idea was supposed to give the cabinet “metal” look and provide extra security. It was also the cheapest way of fabricating the chassis comparing to completely metal design.
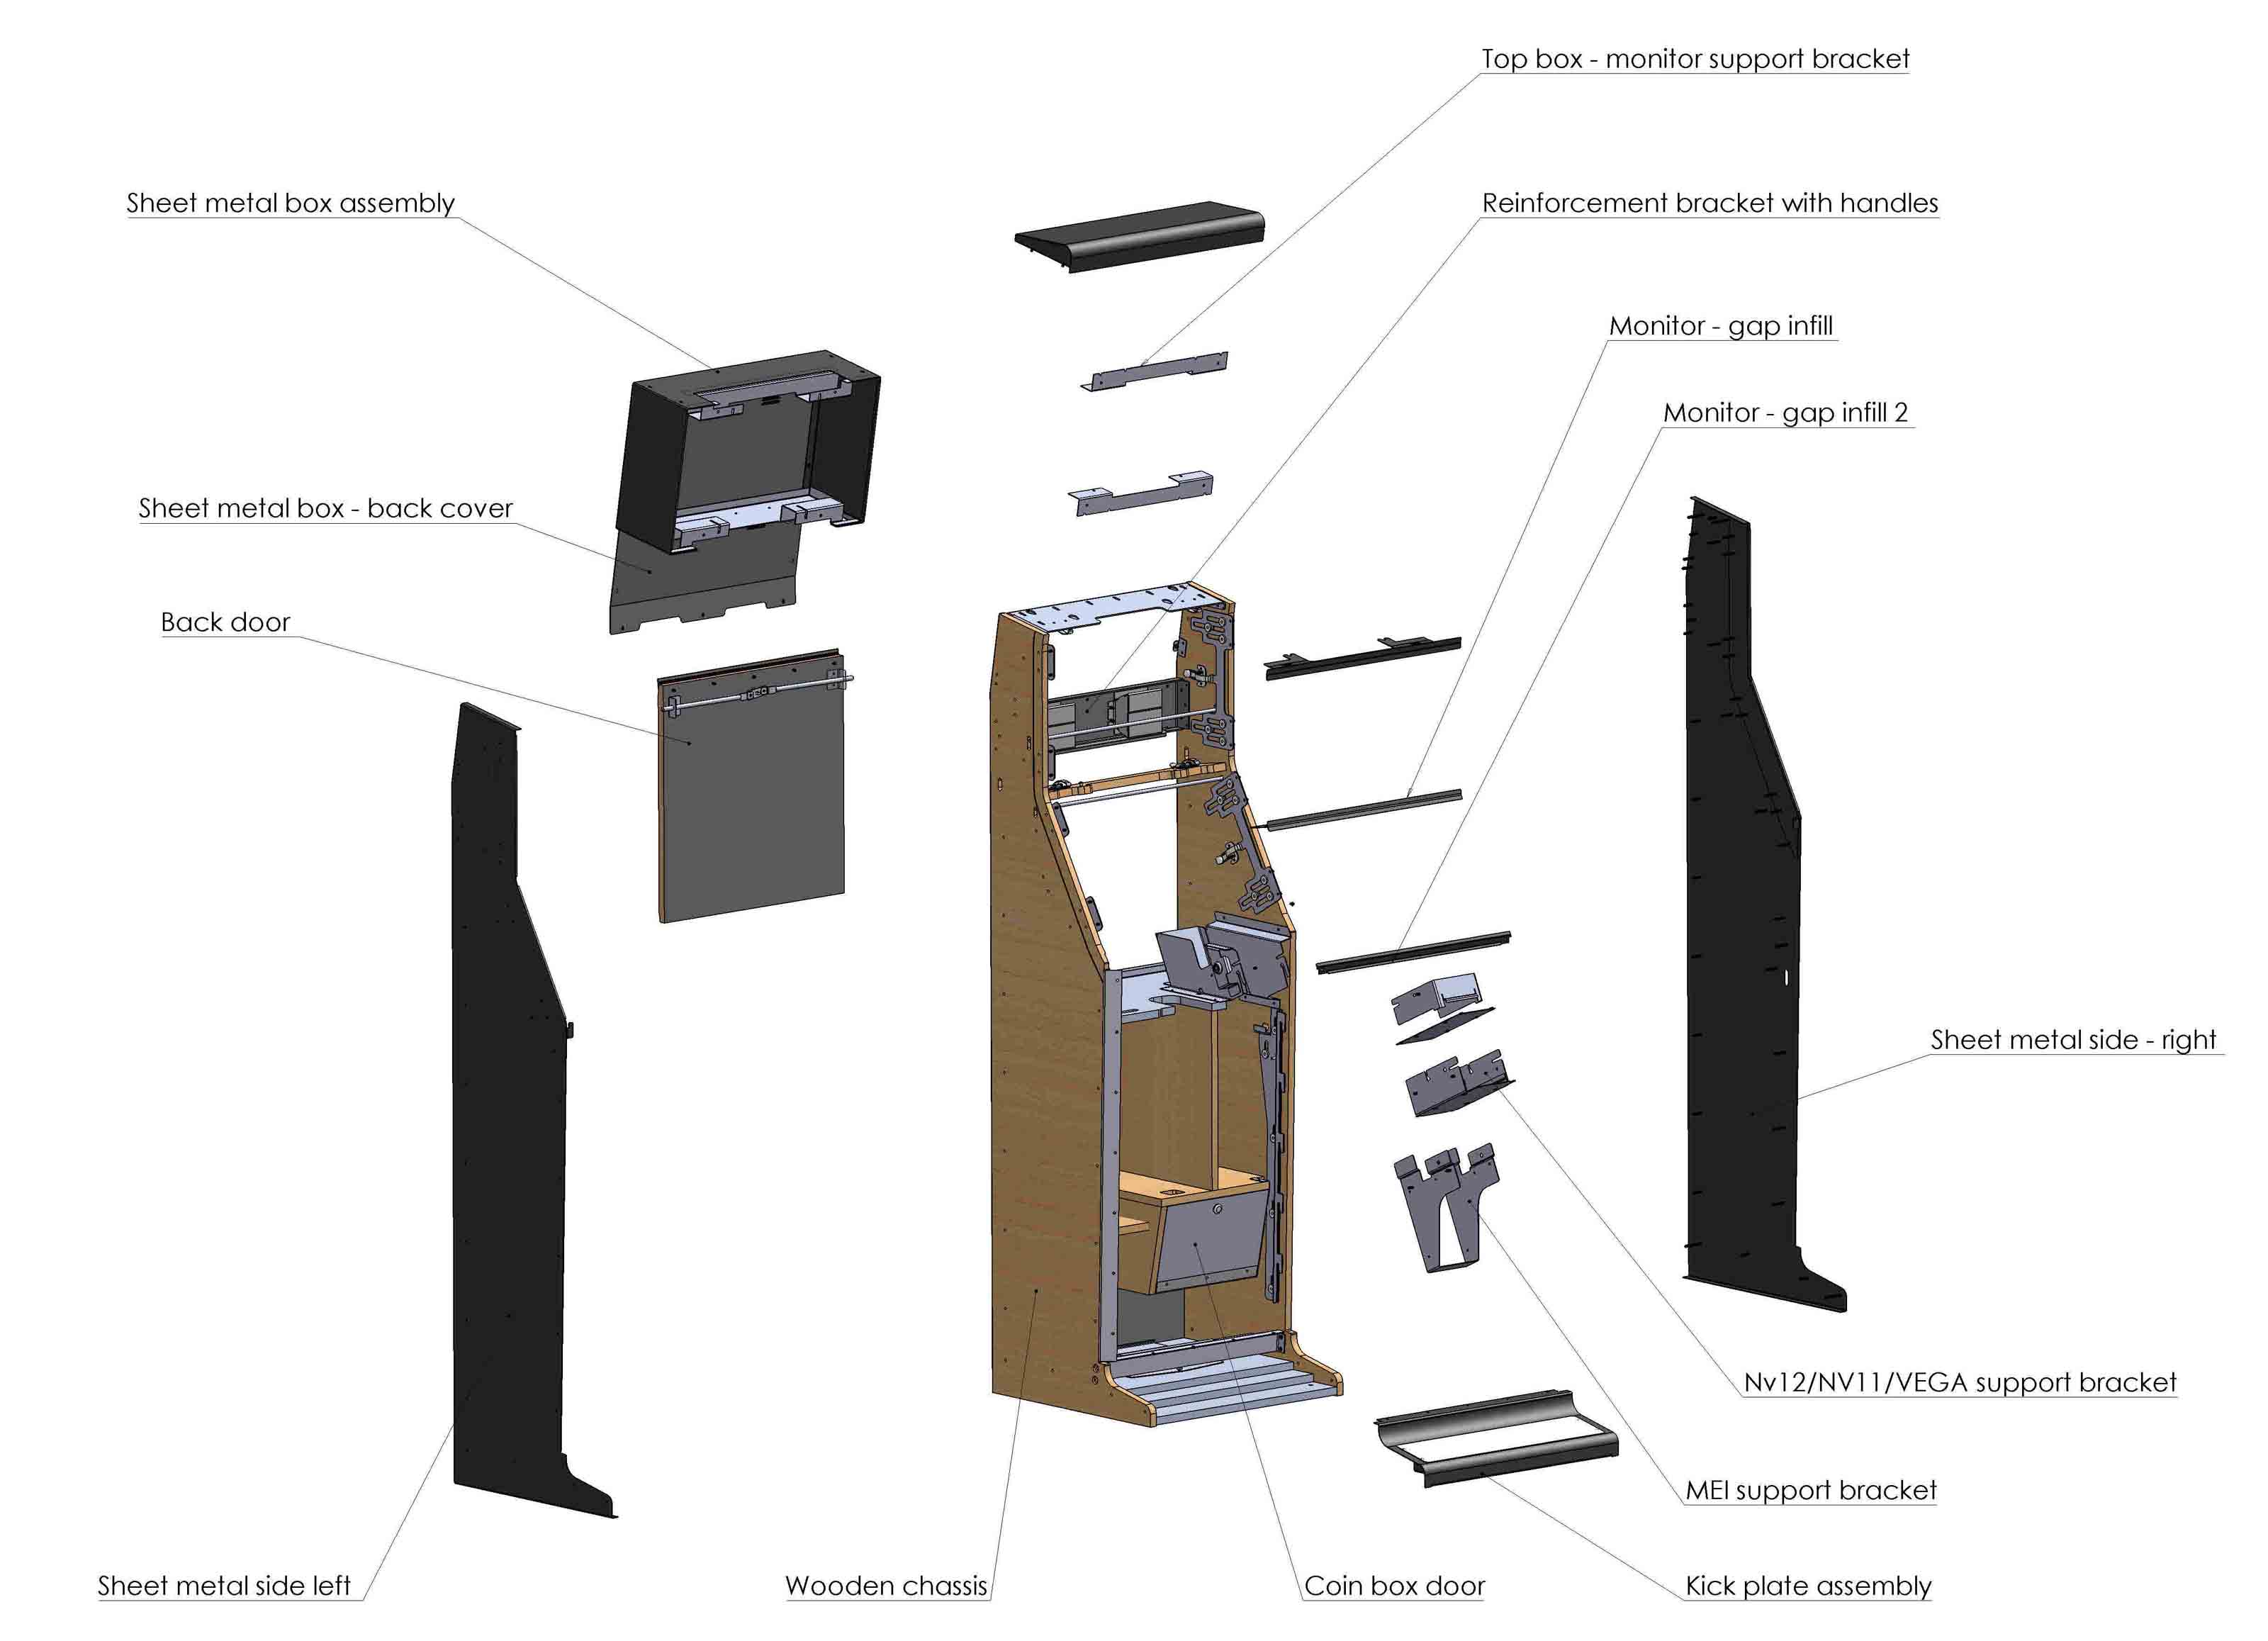
Picture.1 – Initial concept idea
It took around 6 month to bring the initial idea of this concept to life. During that time I was actively reviewing my work with the company management and making updates to the overall design.
One of the challenges for me was the design of the front plastic door. The cabinet required big door in order to allow easy access to internal technology and service maintenance. As the result, the overall height of the plastic door composed 1100mm with the overall width of 579mm. The tooling size was twice the size of the door and took around 3 days of machining time by subcontractor.
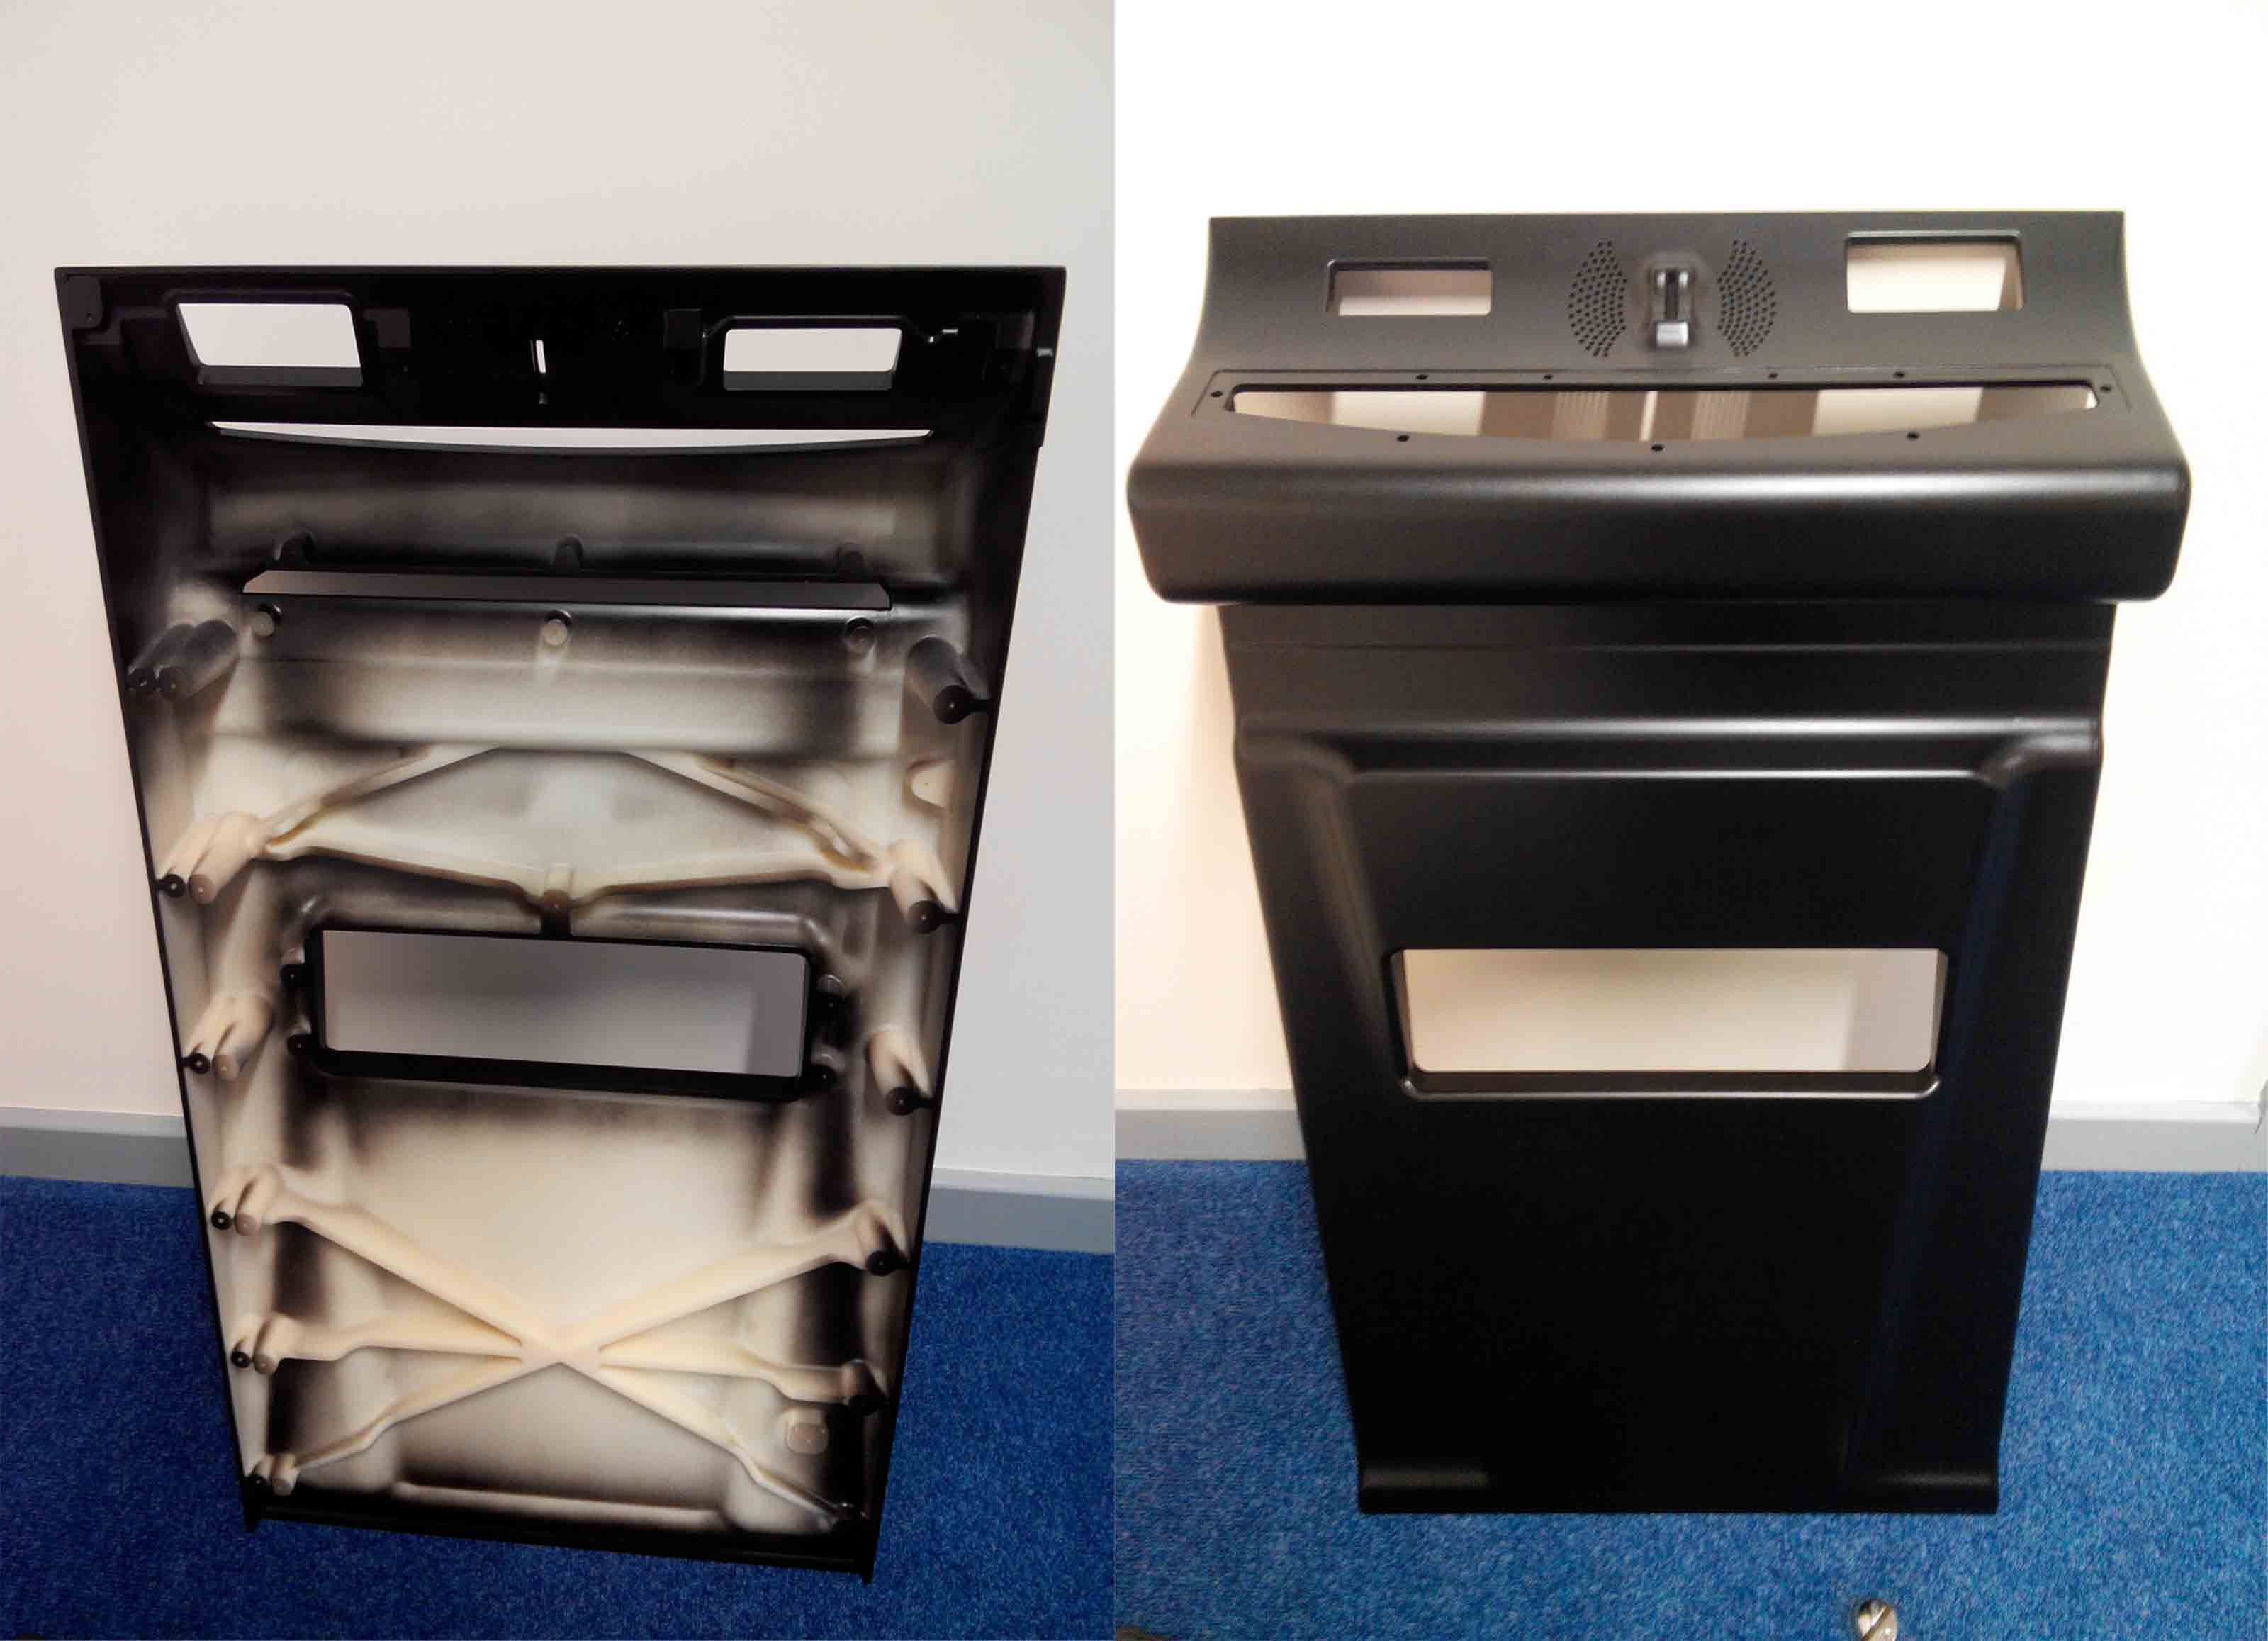
Picture.2 – Front plastic door design
It was very exiting for me to work with the design of the door as it was the biggest plastic moulded part in my career at that time. I spent around 2 weeks finalizing the design and during that time I made a number of changes to achieve the best draft angles, rigidity of the final part and molding performance. I was happy with the final result.
>Another plastic molded part of the cabinet was the coin tray. Comparing to the front door it was relatively simple part (pic. below).
Picture.3 – plastic coin tray design
When I was close to the finish line, the whole concept suddenly took an unexpected turn as the company management discovered a new metalwork supplier with attractive fabrication prices. The decision was made to convert the whole cabinet into the sheet metal design.
The conversion process took around 6 weeks and the cabinet was designed in 2 versions – “Triple” and “Twin” screen. Each version could be converted one into another with minimum modifications.
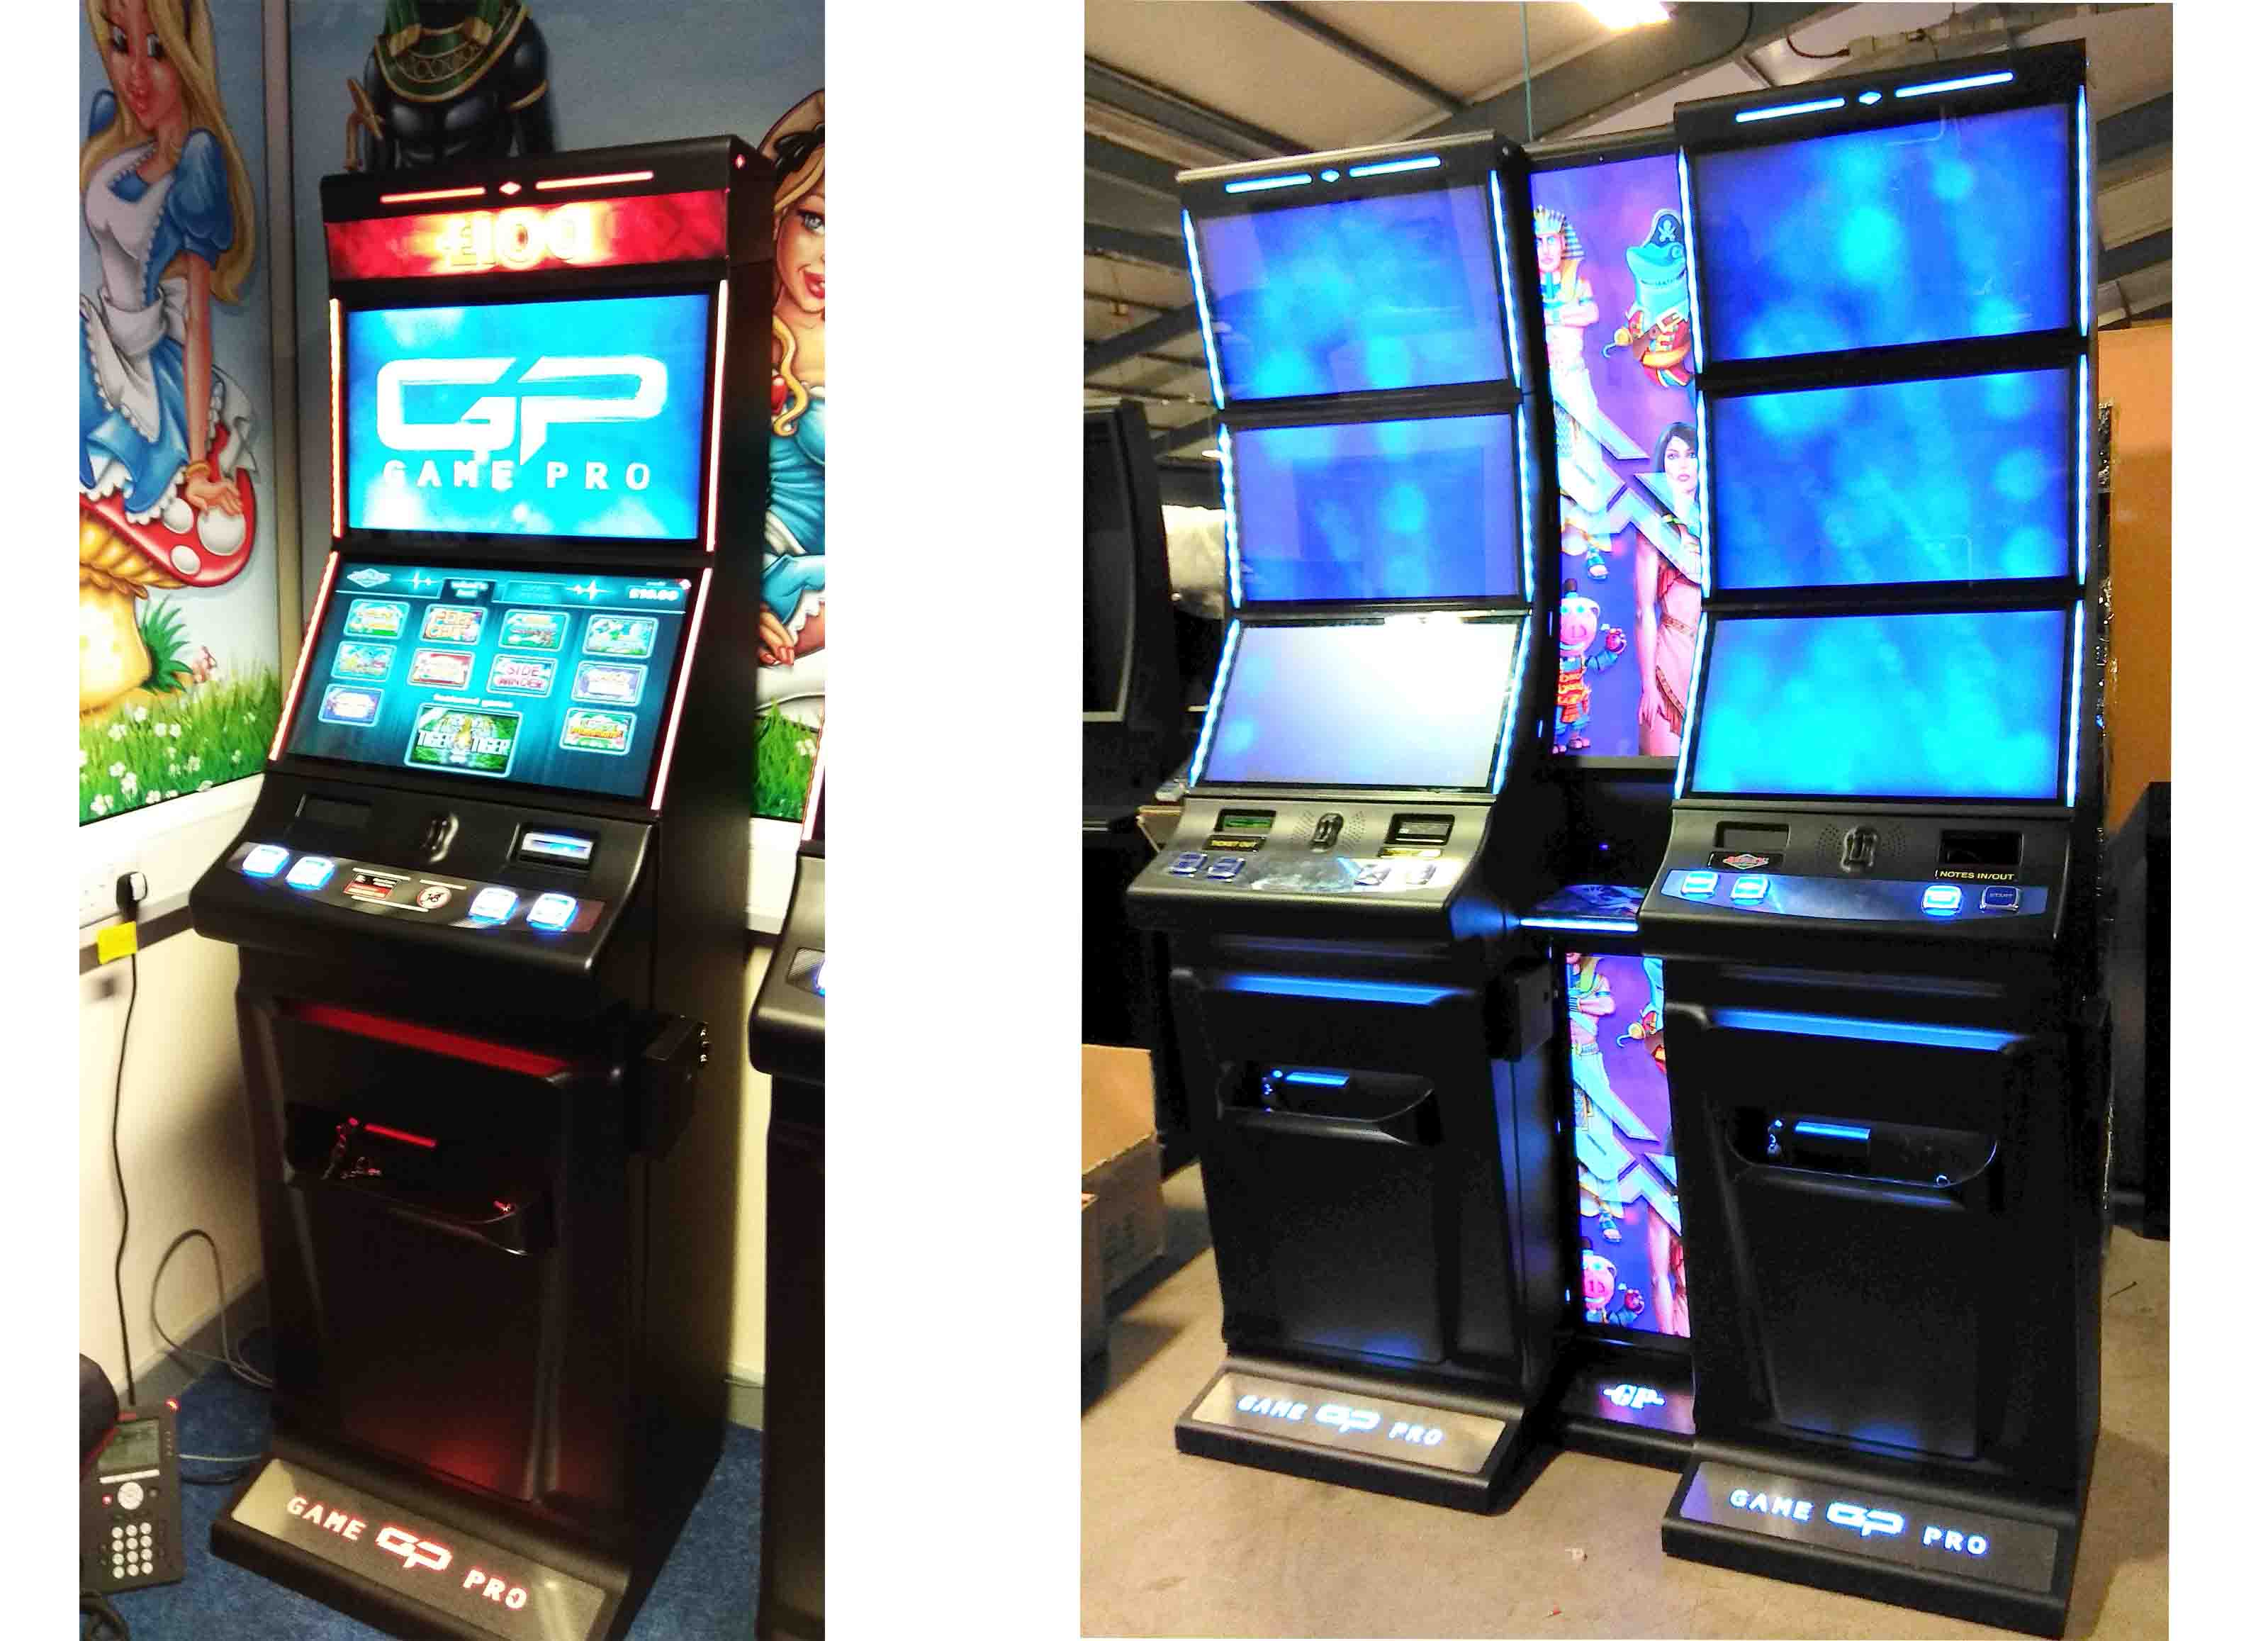
Picture.4 – GamePro cabinet – final result (Twin screen version on the left and Triple version on the right)
The cabinet received a lot of attention on the market and as a result became the company top selling product. I was happy to see the final result of my work and success of the product.
Name “Triple” comes from the type of gaming experience which box provides for a group of 3 players. The box was designed to be fitted on top of 3 gaming machines which are sitting in one row and allowing players to have a common game apart from an individual game which each player has.
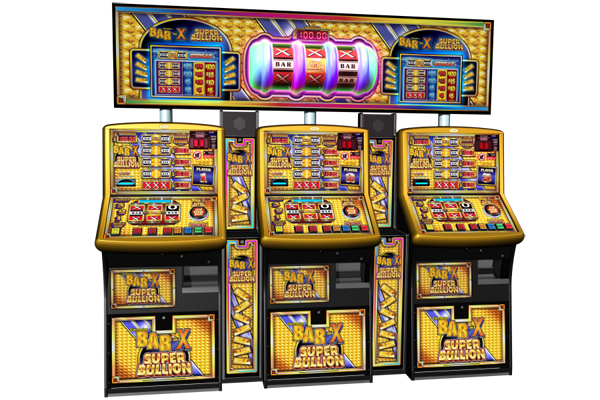
Picture.1 – Triple top box CAD visualization
The box is supported by 3 metal columns attached to the gaming cabinets and 2 wooden infills which are sitting between them. This type of boxes are commonly seen in a big leisure centers and casinos.
One of the most attractive feature of the design is the big protruded reels with halo LED illumination. This feature was achieved by a number of vacuum form components which were designed to be perfectly fit between each other as well as the front acrylic door.
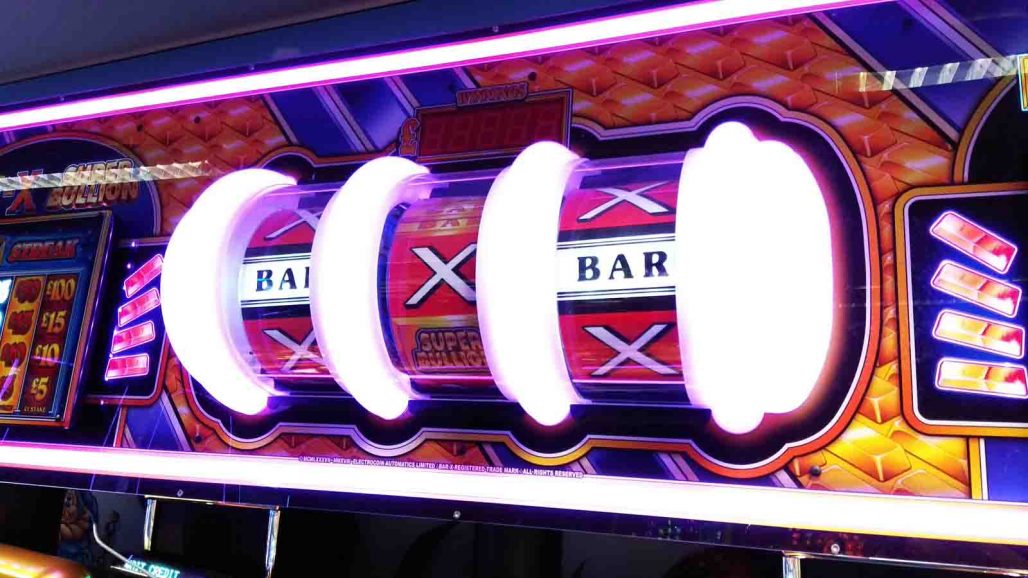
Picture.2 – Protruded gaming reels and illumination
Another attractive feature of the box was 2 gaming displays fitted to the front door and 2 illumination lines near the top and bottom edges of the door.
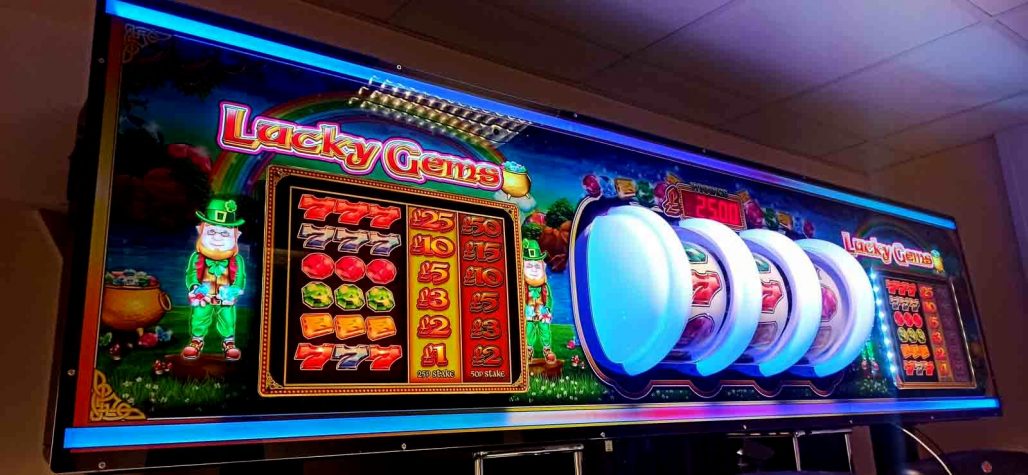
Picture.3 – Top box – Small gaming displays (as seen on each side of the box)
One of the technical challenges which I faced during development of the box was the rigidity of the front door and the box itself. The door was supported by a number of hinges on the top and operated by a couple of gas struts which were lifting it up when the lock was released.
To prevent any “sag” and keep the whole structure rigid, I introduced a number of reinforcement brackets which helped to support the back panel in the upright position and spread the load evenly along the entire length. This idea worked very well and the box went sturdy.
The box became poplar pretty quickly and I was happy to see the success of this product.
This time I was asked to develop a “circular” version of
infillto allow 5 gaming cabinets to be positioned in one circle. It was quite sophisticated idea taking into account that one of the requirements was to keep the top part curved (with acrylic panel).
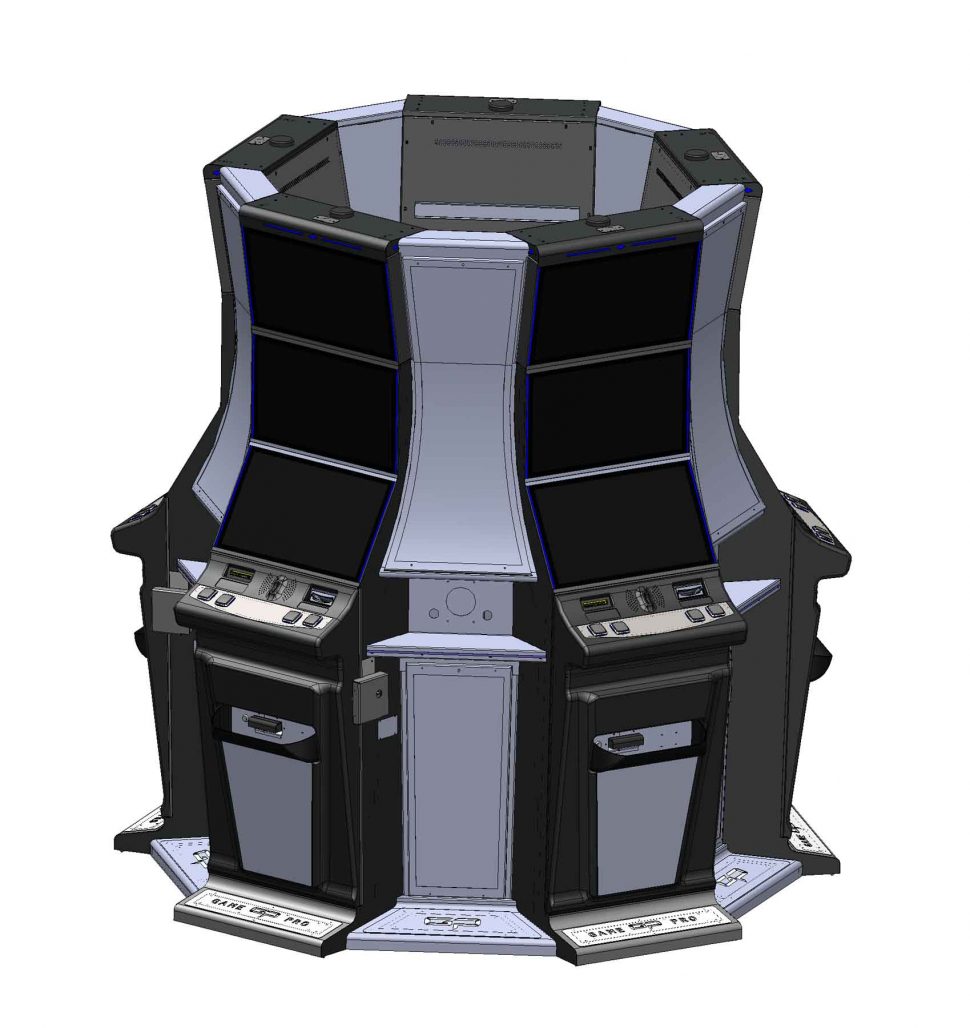
Picture.1 – “Circular” version concept
This concept tested my imagination and designing skills as practically all faces were sitting angular in relation to each other. One of the challenges for me was to create a nice set of alignment elements in order to allow manufacturer weld all components in precise position.
As it was with
version of infill, the new version also received illuminated drink shelf and charging point for gadgets. Top and bottom door were designed to be easily removable in order to allow easy access for maintenance and replacement of the artwork panels
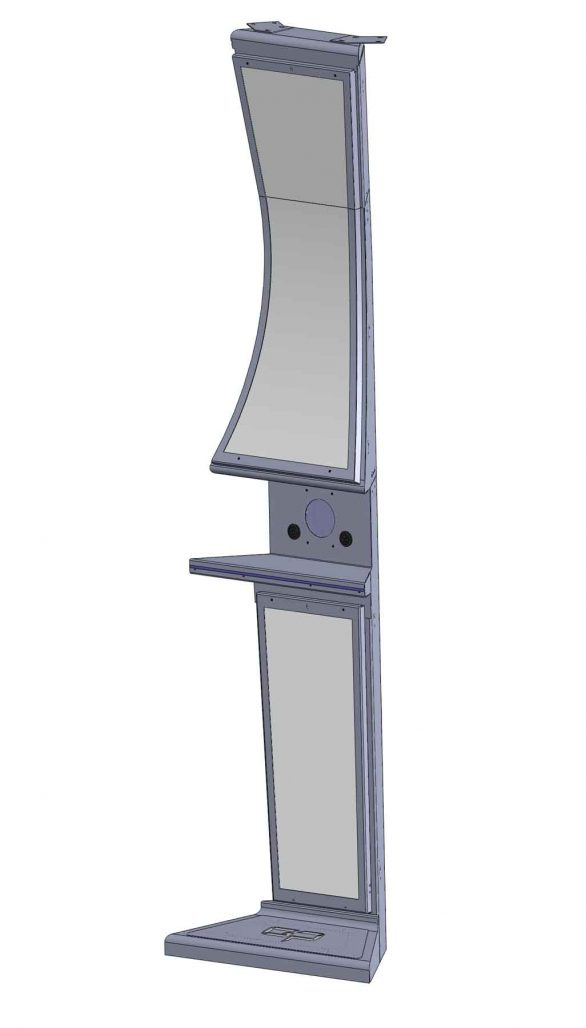
Picture.2 – “Circular” infill CAD model
I was quite exited to see the first prototypes and very happy with the overall quality. Development samples were tested in-house and upon accomplishment of these tests I made a number of minor updates which brought the quality to the top level.
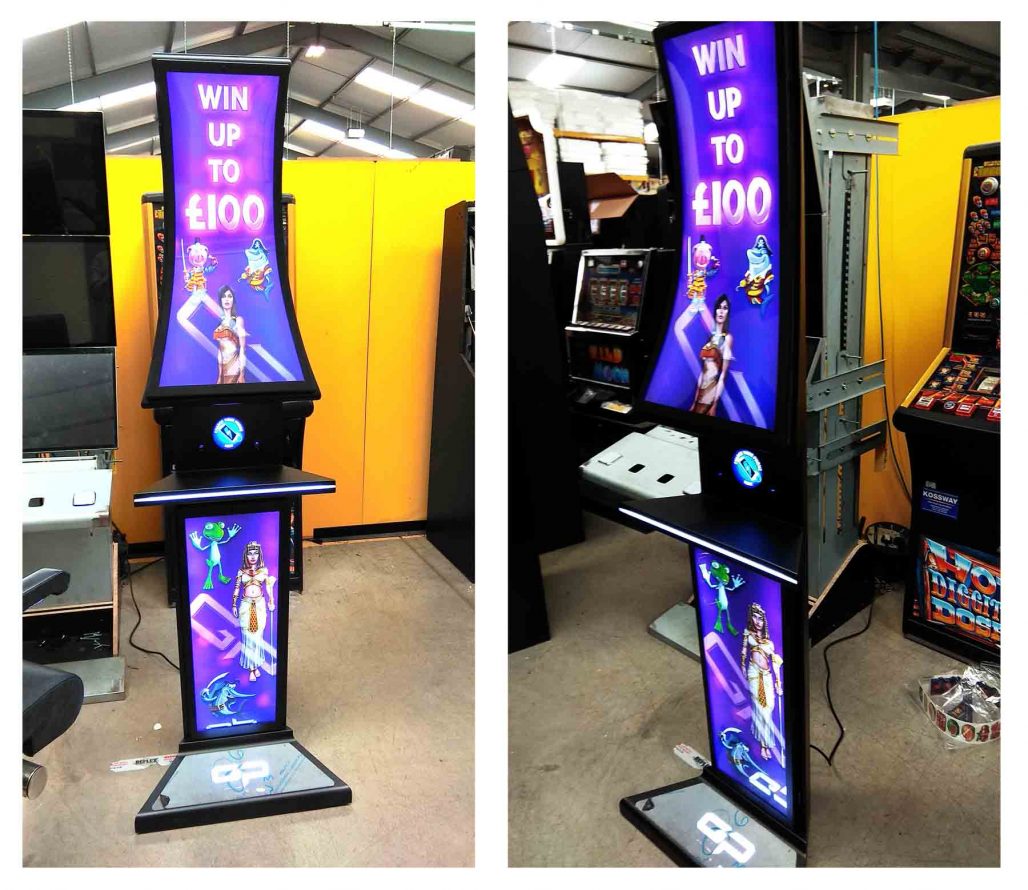
Picture.3 – “Circular” infill final product
The product received quite a lot of attention on the market as it was difficult to find similar product. I enjoyed developing this product and very happy with the result.
Infills are those little cabinets that are fitted between main gaming machines in order to create a constant line / or circle of cabinets without gaps between them (most commonly seen in a big leisure centres and casinos). They also allow each player to have a comfortable amount of space as well as provide the space for a service maintenance.
After nearly a year since accomplishment of the GamePro cabinet, I was asked to develop another version of this line – GamePro Max cabinet. One of the main requirements was to develop a cabinet with a low position of the button deck to allow players enjoy gaming experience while sitting on a chair.
picture here
Picture.1 – “Circular” version concept
Back in 2015 I was first contacted by a client whose business was laid within design and construction of canopies, playground shelters and covered walkways. Below you can see a small collection of projects which were accomplished for the client.
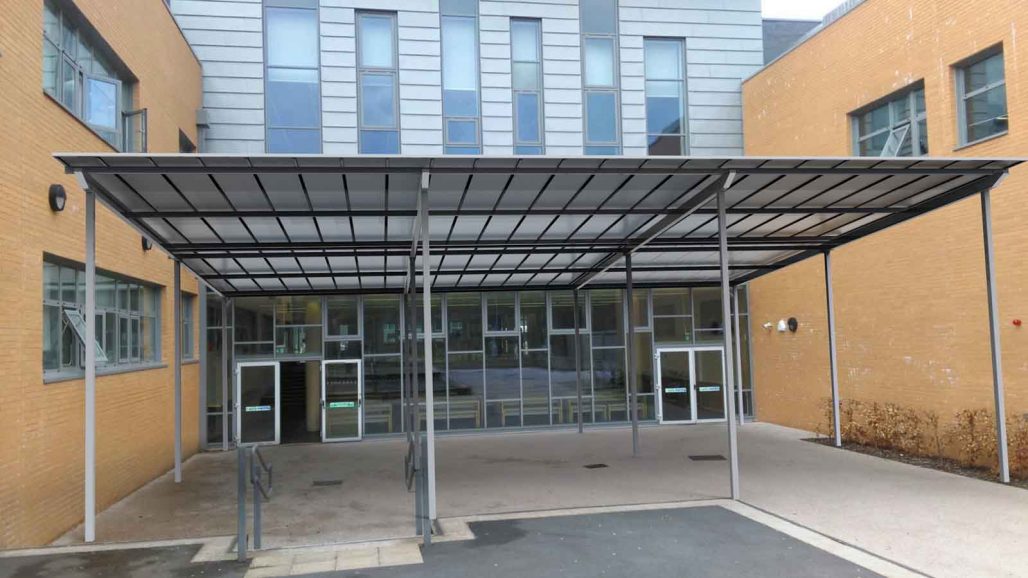
Picture.1 – Canopy concept – covered entrance area
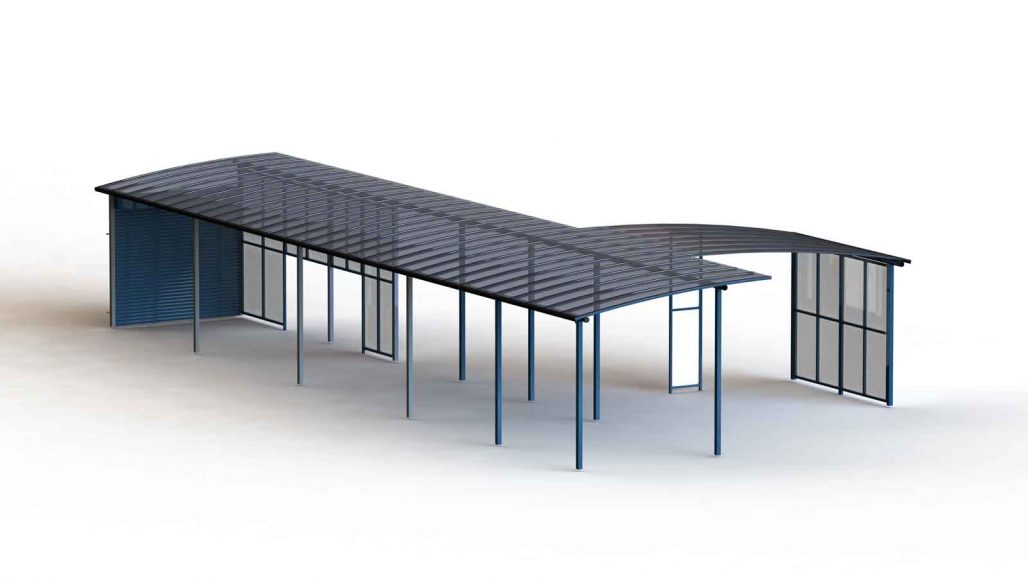
Picture.2 – Curved roof canopy with side panels
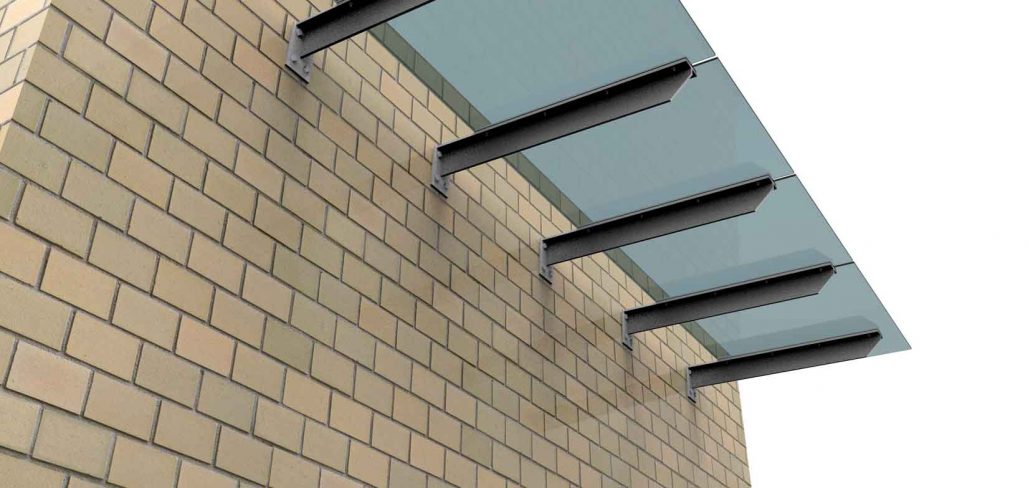
Picture.3 – Canopy wall mounted concept
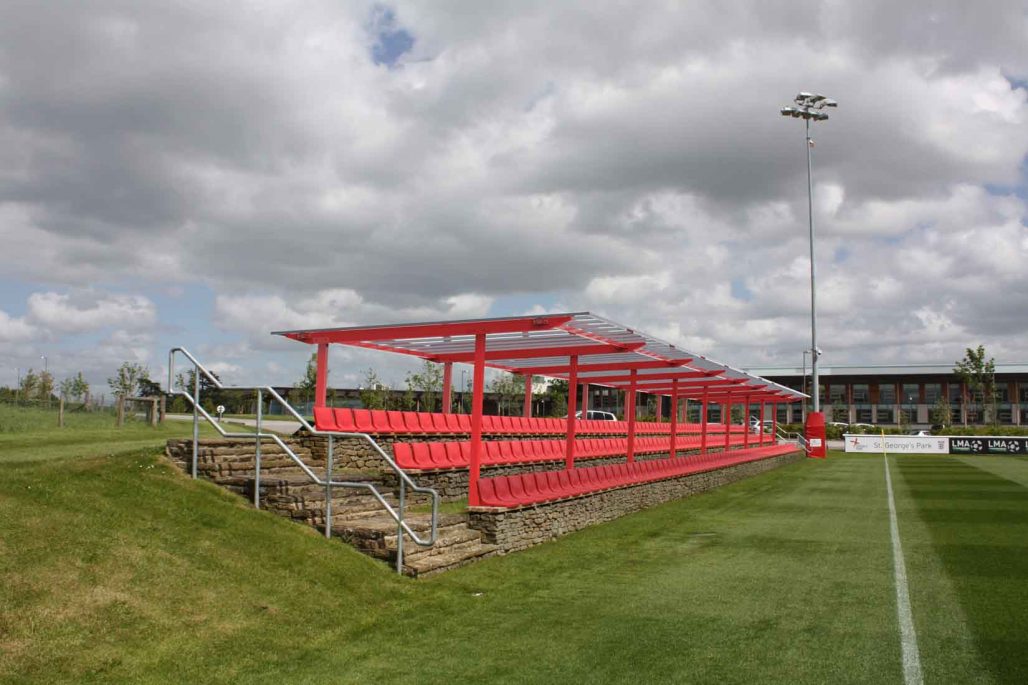
Picture.4 – Stadium canopy covered area
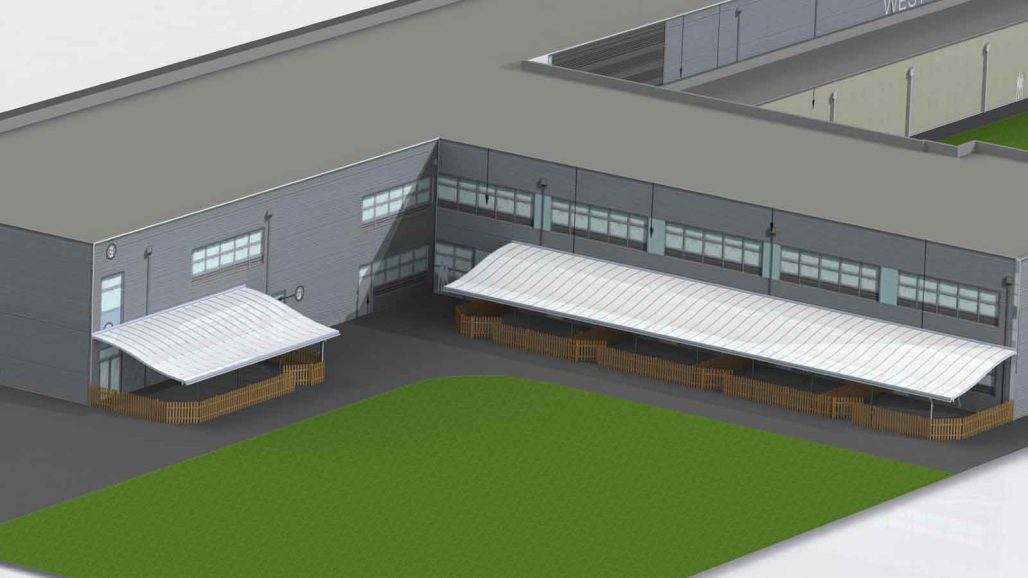
Picture.5 – Concept of curved roof canopies
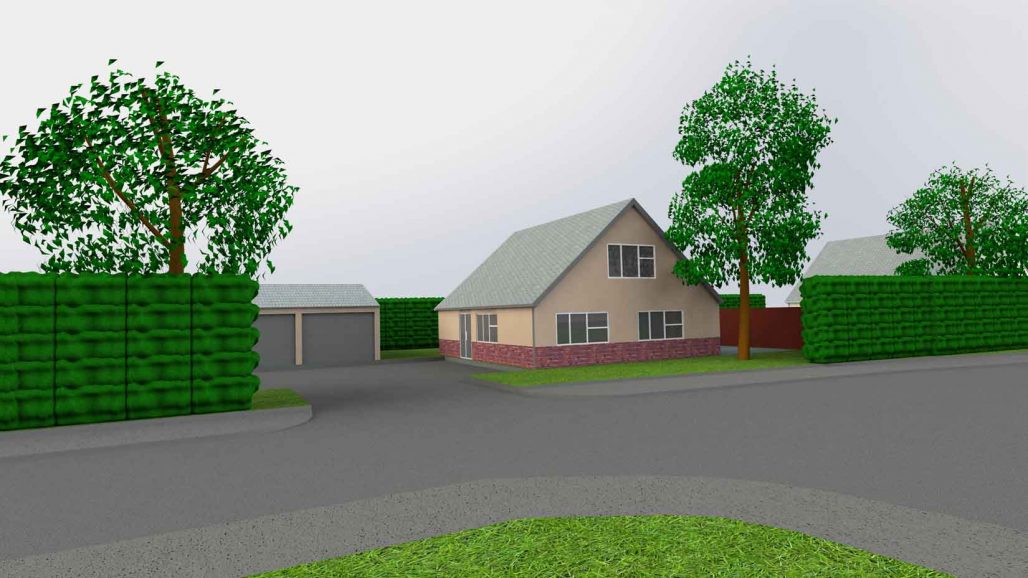
Picture.6 – CAD visualization of site area
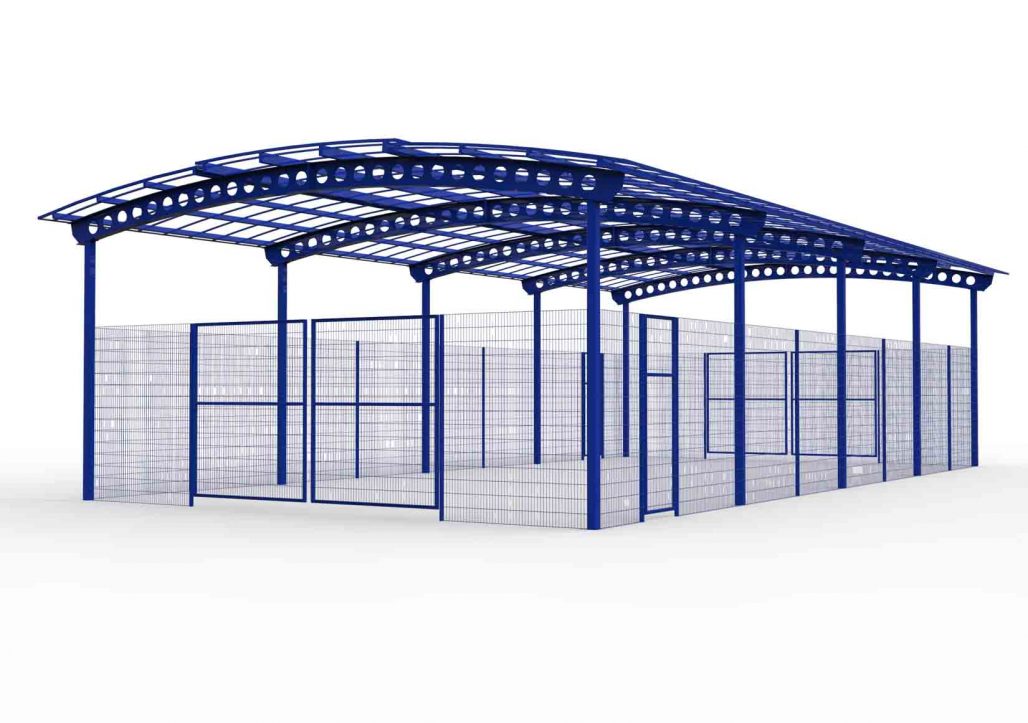
Picture.7 – “Muga” canopy concept visualization
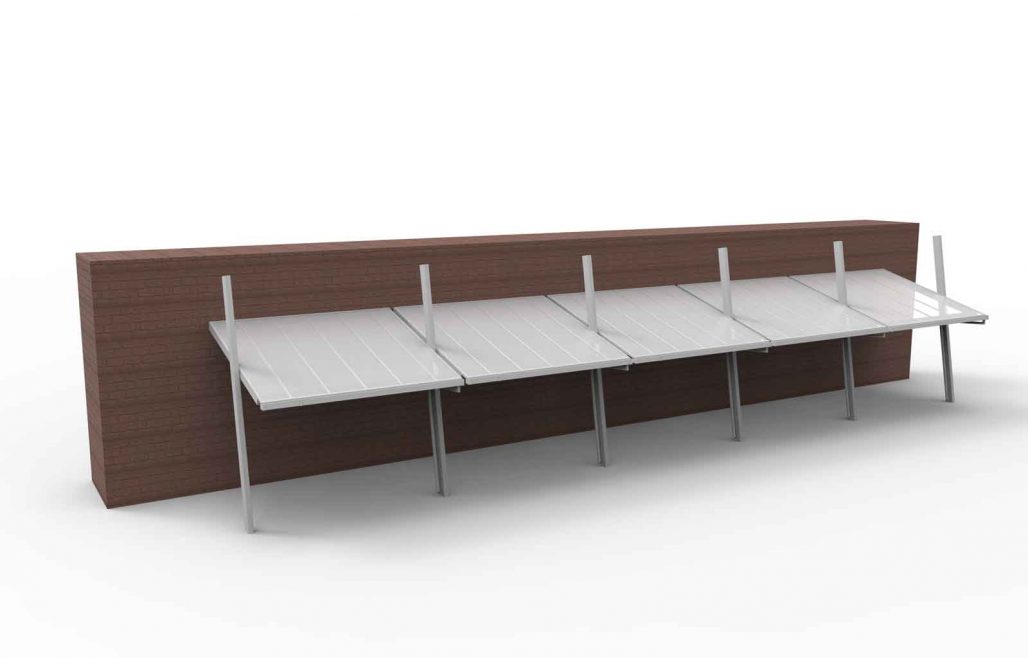
Picture.8 – Cantilever canopy concept
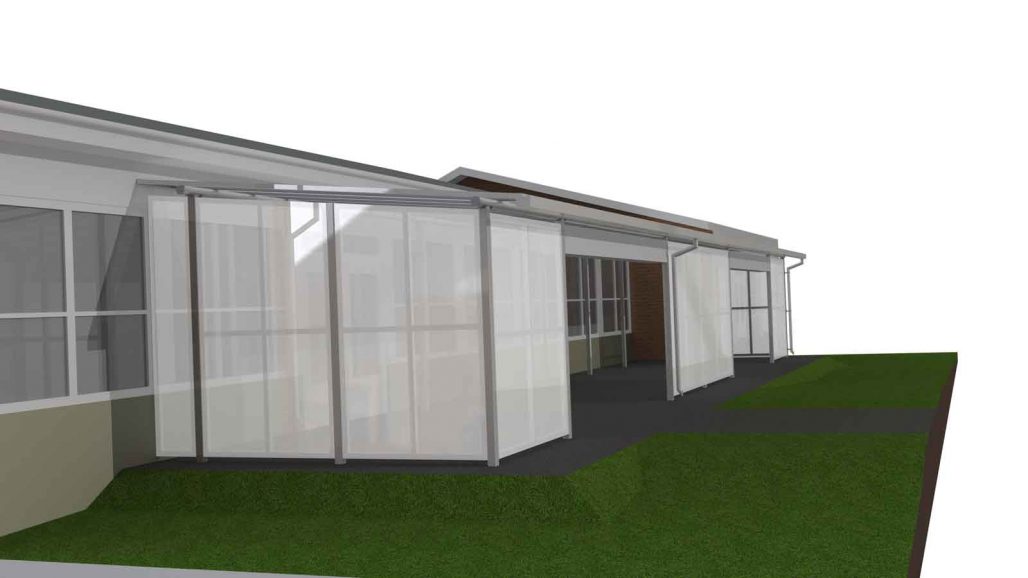
Picture.9 – School covered entrance area view 1
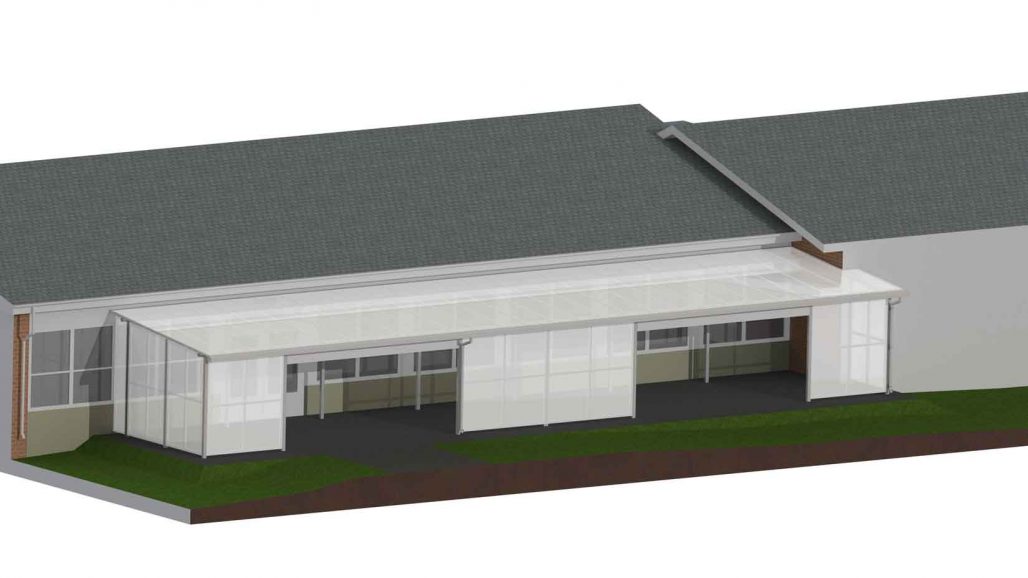
Picture.10 – School covered entrance area view 2
A new client asked me to create a short animation video to explain the overall concept of his new product – “Fountain Spray Bar”. Apart from animation, I was also asked to produce rendering pictures of the product in a different live scenes.
Video.1 – Fountain Spray Bar overall concept
The first animation video shows overall concept of the spray bar assembly with jet nozzles. The second one shows how multiply spray bars can be connected to the water pump with the next installation to the wall surface.
Video.2 – Spray bar multiply installation
Rendering pictures were made in the KeyShot with some post processing in Photoshop.
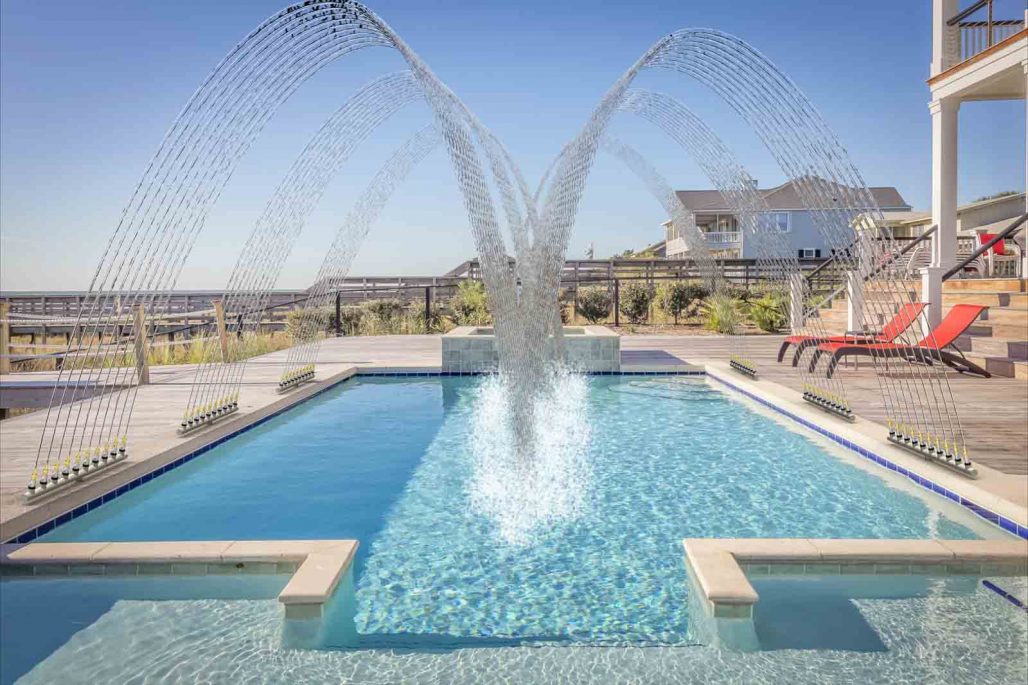
Rendering Picture.1 – Spray bar multiply installation to swimming pool

Rendering Picture.2 – Spray bar “Arch” installation option
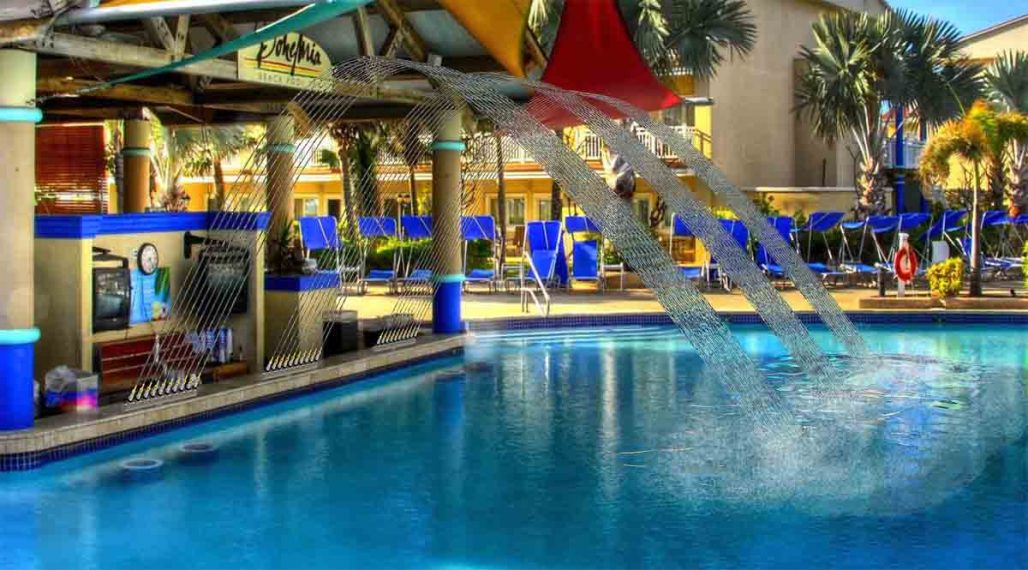
Rendering Picture.3 – Spray bar swimming pool installation option
The client was happy with the result and I hope we will have more cooperation in the future.